The intention of this post is to explain how a Kubernetes Pod, running at an Azure Kubernetes Service, can be attached using kubectl and the Visual Studio Code Kubernetes Tool
1. Introduction
There are many reasons why a deployed Kubernetes pod needs to be attached at runtime. Therefore I’d like to explain, how this can be achieved by applying dedicated kubectl commands and by using the proper Kubernetes extension in Visual Studio Code.
2. Attaching the Kubernetes Pod using kubectl
I’m going to start with kubectl, which is capable of conducting several commands for your Kubernetes cluster. For more details with regard to kubectl, see following link below:
Ensure that your kubeconfig file is up to date. For instance: if your Kubernetes cluster is newly provisioned - use following command for providing the credentials to your kubeconfig file:
az aks get-credentials --name <K8s Cluster> --resource-group <Resource Group>
Switching to my Kubernetes cluster (named “patricks-aks”) in the Azure Portal, reveals that there a no running jobs at the moment:
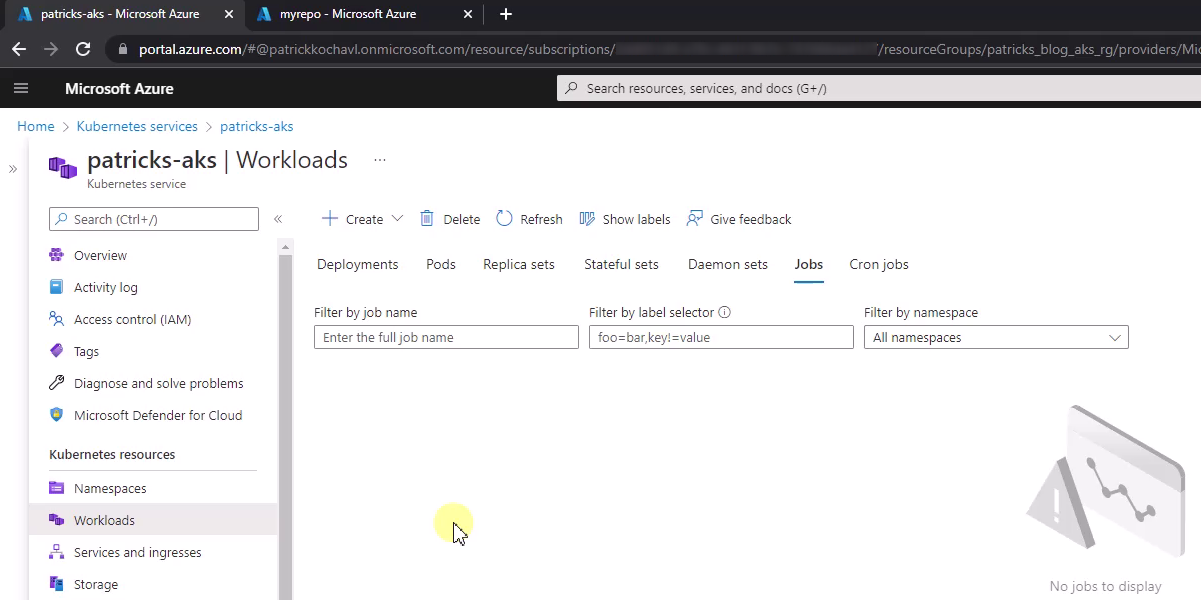
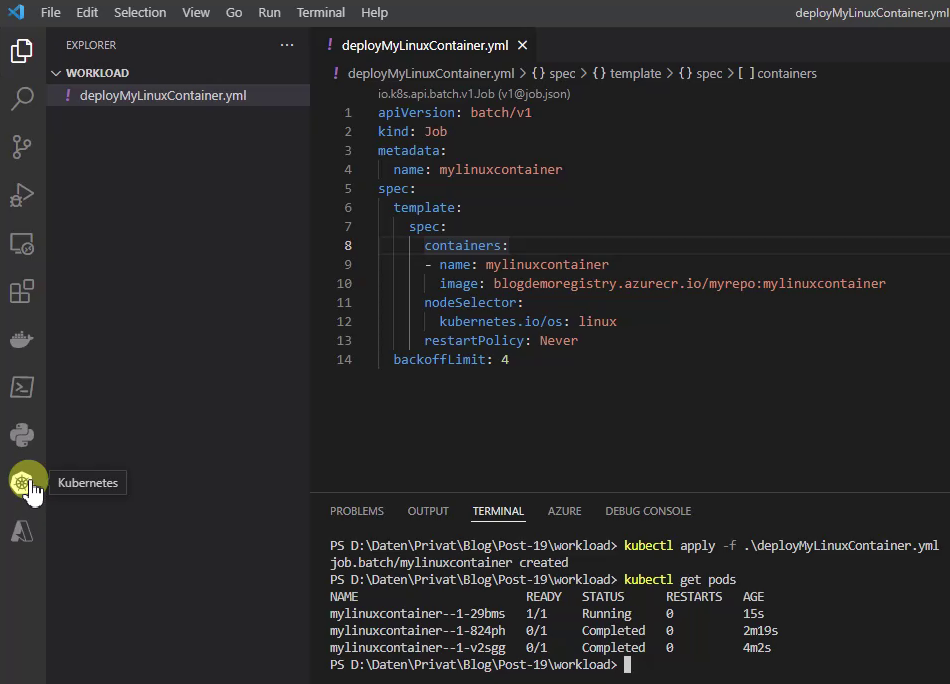
This will change after conducting the first kubectl command. I’d like to deploy a workload from type “job” (see kubernetes.io - Workloads - Job). The workload is defined in a YAML file, which sets the deployment rules. Among others, the YAML file refers to a Container Image, which will run within the Kubernetes Pod. I’ve created a quite simple Dockerfile, which corresponding Container Image will be used for that example. It’s a simple Linux based Container, which just prints “Hi, I’m your Linux Container!”. I’m opening the YAML file with Visual Studio Code and would like to deploy the workload. For that, following command is applied, which is typed in the Terminal of Visual Studio Code:
kubectl apply -f deployMyLinuxContainer.yml
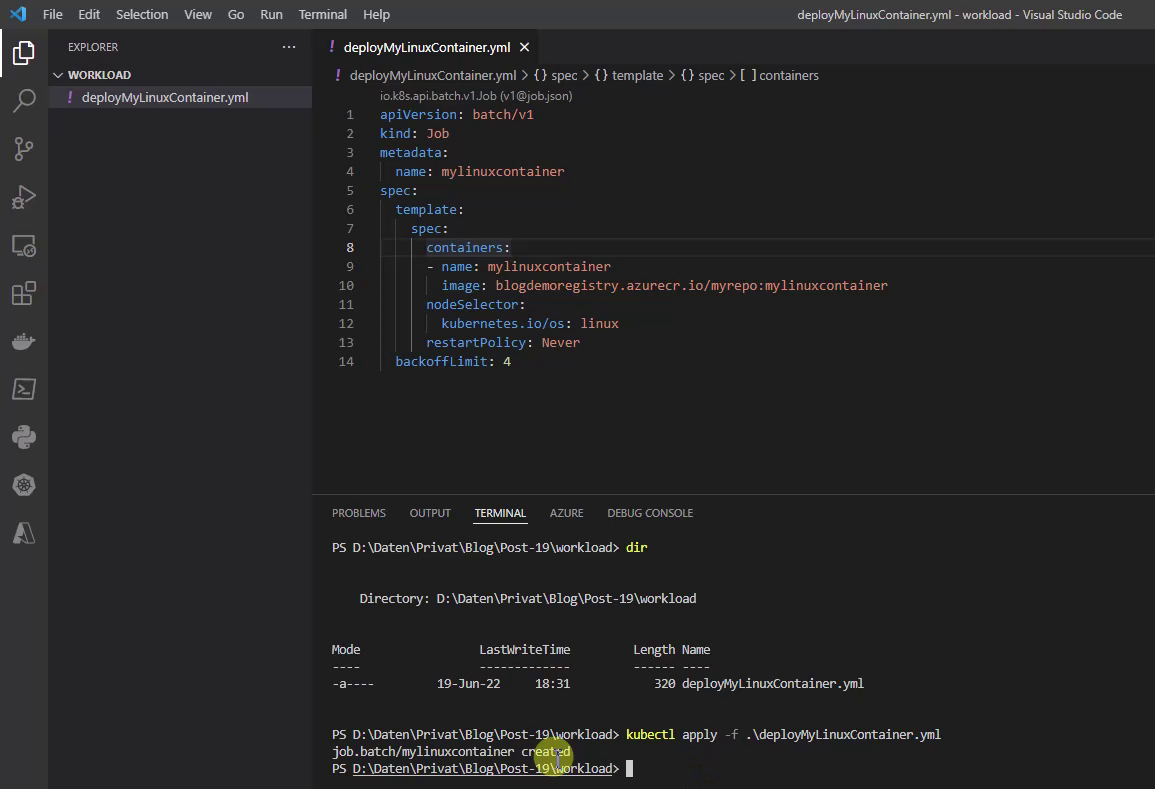
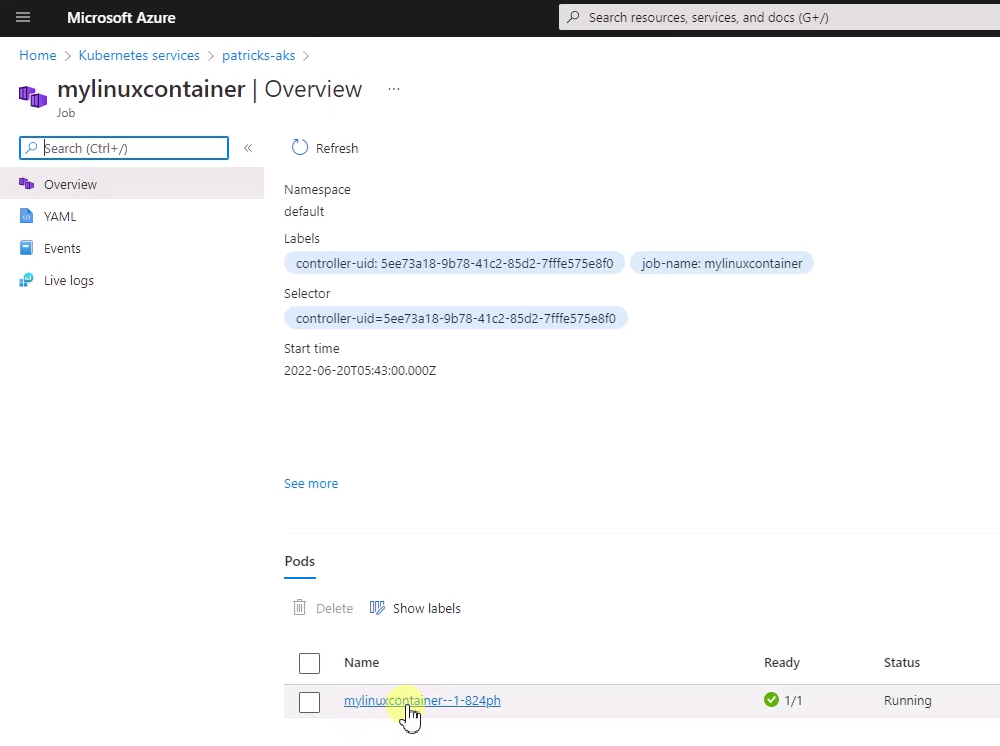
After conducting the command, the job should be created. I’m going to prove that by switching back to the Azure Portal and observing again the “Job” section of the Kubernetes cluster.
As expected, the workload named “mylinuxcontainer” is running.
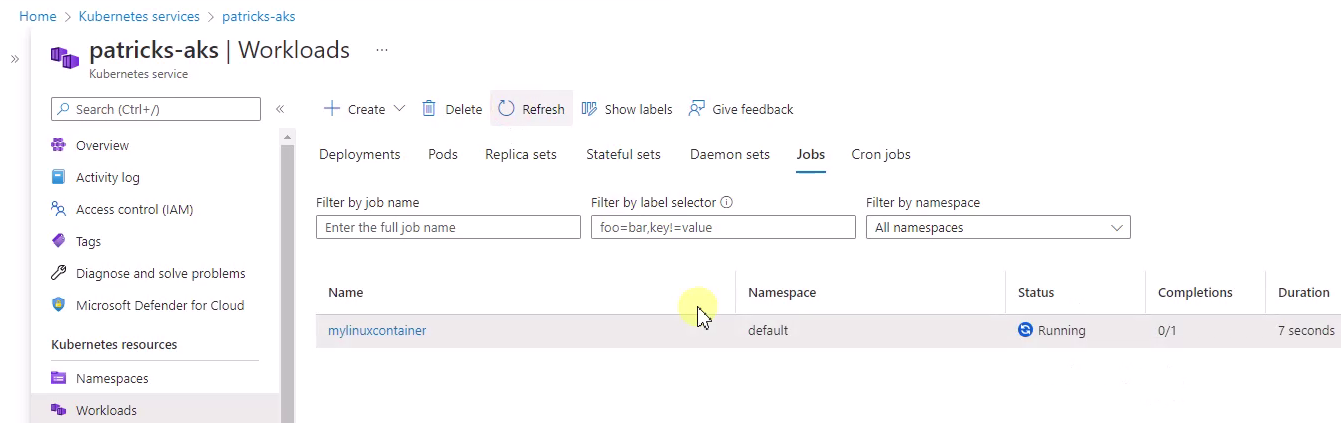
By clicking at “mylinuxcontainer” I’ll be linked to the containing Kubernetes Pod, which name is extened by an additional string, the full name is “mylinuxcontainer–1-824ph”.
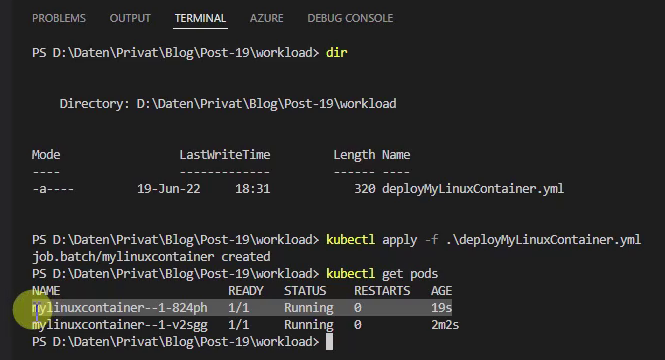
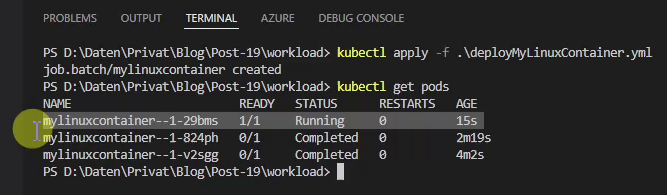
By conducting following command, the running Pods should be listed in the Terminal:
kubectl get pods
This reveals the same running Kubernetes Pod (among others), with the name “mylinuxcontainer–1-824ph”.
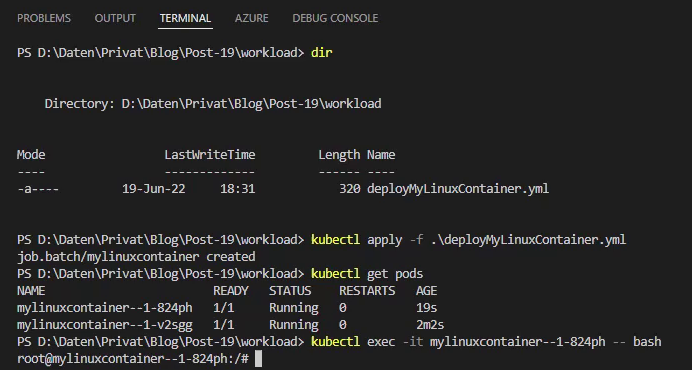
I’m copying the name of the Pod and enter following command for attaching it:
kubectl exec -it mylinuxcontainer--1-824ph -- bash
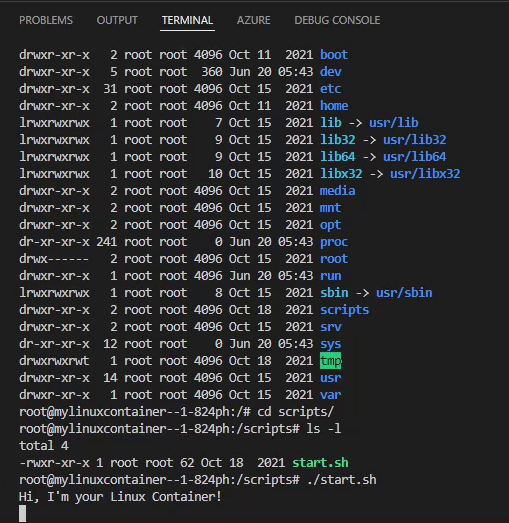
Afterwards, you’re attached to the Pod and you can start with exploring the content of the file system.
In my case, I’m going to execute the “start.sh” script, which prints “Hi, I’m your Linux Container!”.
So, that would be a common approach for attaching a running Kubernetes Pod using kubectl. In the next section, I’d like to show how to attach in a different way - by using an extension of Visual Studio Code.
3. Attaching the Kubernetes Pod by using Visual Studio Code
This section is about using the Kubernetes extension of Visual Studio Code for attaching to the running Pod. For that, I’m again deploying a workload (because the previous one already completed) by conducting the kubectl command again (ensure that the previous workload with the same name is deleted or to use a different name for the workload):
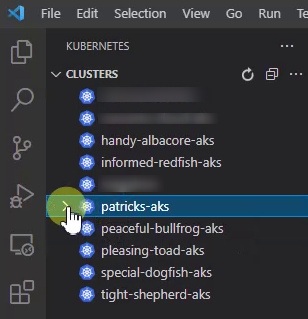
In contrast to using kubectl, I’m starting with selecting the Kubernetes icon on the left - for installing the extension see: https://code.visualstudio.com/docs/azure/kubernetes, respectively marketplace.visualstudio.com - vscode-kubernetes-tools
This provides a list of all Kubernetes cluster, which are defined in you kubeconfig file. The current cluster in that case is “patricks-aks”:
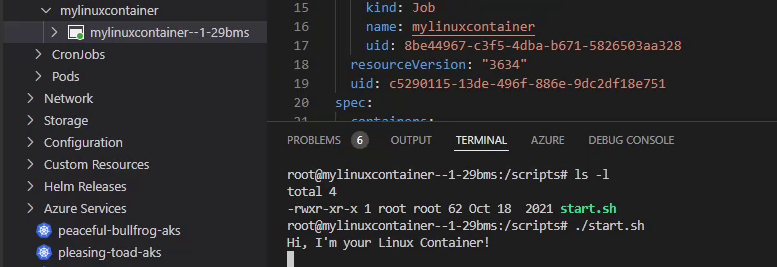
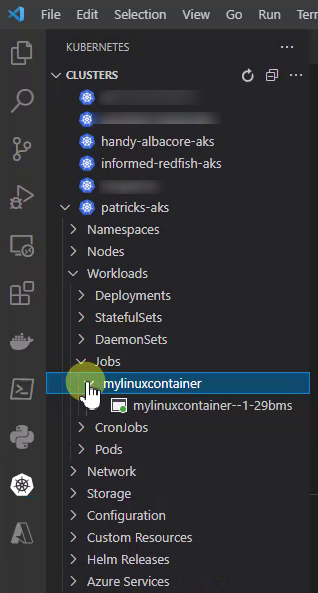
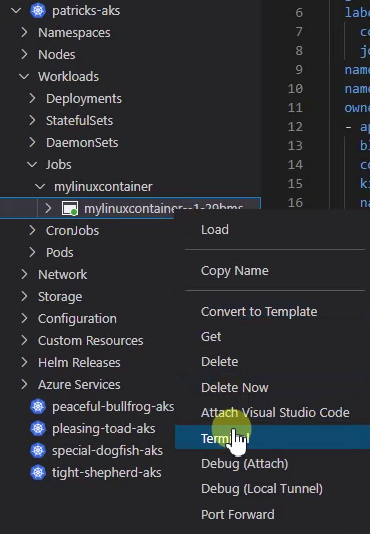
After expanding it, I’m going to select “Job” and “mylinuxcontainer” for getting to the Pod:
Now, I’ll perform a right click at the Kubernetes Pod and I’ll choose “Terminal”:
This results to the same result comparing with using kubectl: the file system of the Container can be accessed:
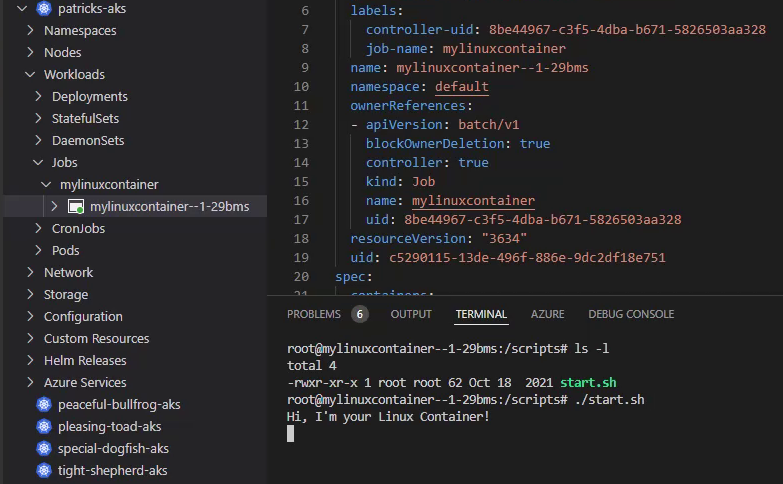
Again I can switch to the “scripts” directory and execute the same “start.sh” file, which again prints “Hi, I’m your Linux Container!”.
4. Video Demo: kubectl and Visual Studio Code
Attaching the Kubernetes Pod by using kubectl and the Visual Studio Code extension, can be seen in following video demo (does not contain an audio track):
5. Conclusion
This post showed two fast ways how a Kubernetes Pod can be attached. You can use kubectl if you feel more comfortable by using the command line. Visual Studio Code provides a great extension for managing your Kubernetes cluster(s) and by simply selecting your Pod by expanding the proper workload type section.
6. References
kubernetes.io - organize-cluster-access-kubeconfig
https://kubernetes.io - cheatsheet - kubectl-apply
https://kubernetes.io - cheatsheet - interacting-with-running-pods