The intention of this post is to explain, how to build an Azure DevOps Pipeline using YAML for provisioning a microservice in Azure using Terraform. A second pipeline will be created for destroying the microservice. In addition, it is described why an Azure Storage has to be used for storing the Terraform State File
1. Introduction
This post is meaningful for you, if you have already gained knowledge about provisioning resources in Azure using Terraform and if you have a basic knowledge about Azure DevOps Pipelines. Instead of creating the resources in a manual way, by using the proper Terraform commands with e.g.: PowerShell - you’d like to do the provisioning with a pipeline.
This post is similar to Azure && Azure DevOps - Provisioning a Windows Virtual Machine using Terraform, but in contrast to that, the pipeline is created by using YAML instead of using the Classic Editor. My previous post was about provisioning a microservice including an Azure Kubernetes cluster and an Azure Container Registry with Terraform in a manual way - I’m going to use that specific Terraform Configuration File (with a small adaptation) for the Azure DevOps YAML Pipeline.
2. Overview
I’d like to start with an overview of the prerequisites (despite from an active Azure subscription) for the creation of the YAML pipelines:
- Azure DevOps Agent: Dedicated Agent for running the Pipeline Jobs, including the mandatory prerequisites (among others Terraform)
- Storage Account including Container: Storage in Azure of the Terraform State Files
- Service Connection: Establishing a connection between the Pipeline and the Azure subscription
- Azure Repo: Versioning of the Terraform configuration file and the YAML files, defining the pipelines
- Terraform configuration: Defines the necessary rules for the resource - the microservice, containing an Azure Kubernetes Service, Azure Container Registry, etc…
3. Prerequisites for the implementation of the Azure DevOps YAML Pipelines
Let’s go through the list, step by step, for getting the implementation done. If you are just interested in the creation of the Azure DevOps YAML pipelines only - switch to section 4.
3.1 The Azure DevOps Agent
Ensure, that you’ve an Agent ready in your Agent Pool, at which Terraform is installed.
See https://learn.hashicorp.com - Install Terraform for installing Terraform.

I’m using a dedicated Linux Container (Terraform and the Azure CLI installed), running it on my machine and registering it in my “TestPool” with the random Agent Name “5ffa467cc1da”. Ensure that the Agent is running.
3.2 The Storage Account: adding a Container
Terraform uses State Files (see terraform.io - state), to determine the state of the resource - so whether it is locked or available. If you provision the resource in a manual way from your machine, than everything is fine, as the place from which you’re triggering the Terraform commands is always the same. This won’t work for pipelines - as the checkout of the sources (Terraform configuration files) - could always be a different working directory of the Azure DevOps Agent (in addition, settings could be applied to clean up all sources anyway before the pipeline job starts). Therefore, it is a good approach idea to define and to set up an unique spot for the State Files - that would be the Container, which is included in a Storage Account.
A prerequisite for the Container (as Storage for the Terraform State Files) would be a Storage Account. I’ve set up my personal Storage Account “patricksdemostorage”. If you don’t have a Storage Account, create one using a name of your choice - for that see docs.microsoft.com - Create a Storage Account
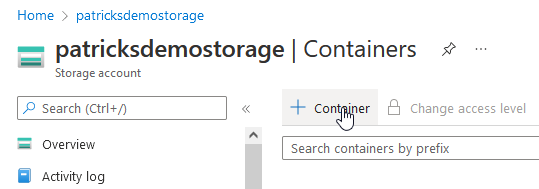
If a Storage Account is available, the mandatory Container has to be created, therefore click at “Container”:
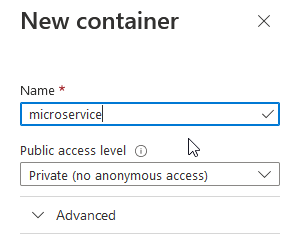
After that, provide a name for the Container, I’m going to choose “microservice”:
After the first provisioning, respectivelly the first deprovisioning, you can observe the “Lease State”, for instance:

The related snippet of the configuration can be seen below:
  backend "azurerm" {
    resource_group_name  = "patricksdemostorage"
    storage_account_name = "patricksdemostorage"
    container_name       = "microservice"
    key                  = "microservice.state"
  }
The Container and the backend configuration ensures that the State Files are stored and accessed at an unique spot. So, it doesn’t matter whether you’re provisioning the resource from your e.g. laptop and the destruction is triggered by an Azure DevOps pipeline or vice versa.
3.3 The Service Connection
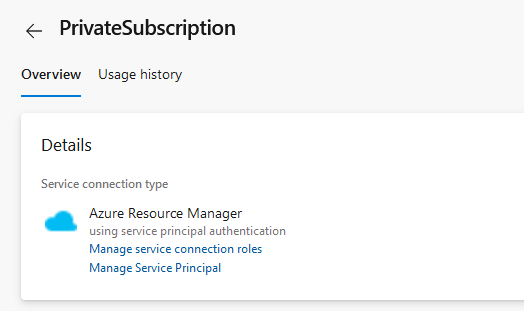
You need to get access from your Azure DevOps Server to your Azure Subscription. To enable that, a Service Connection has to be established. I’ve named the Service-Connection “PrivateSubscription”. Doing a manual setup would include to enter mandatory information, e.g.: the Tenant ID. Setting up that kind of service connection was very easy - just choose the correct type - “Azure Resource Manager” - afterwards you can choose your subscription of choice - the necessary settings will be applied in an automated way.
3.4 The Azure Repo
I’m versioning the Terraform configuration (.tf file) and the YAML files (defining the pipelines) in an Azure Repo, named “IaC”. Before running the pipelines, you probably would like to try the configuration in a manual way. If the file is already versioned, ensure to add statements to the gitignore file, that no Terraform State Files are going to be tracked.

3.5 The Configuration
The configuration, which will be used for provisioning the microservice can be seen in the snippet below. Please see my previous post if you’d like to get more information about the manual way of applying Terraform commands - patrickkoch.dev - Provisioning of a Kubernetes Cluster with an attached Container Registry and Deployment of a Linux Workload and if you need details about the configuration. The current configuration contains the mentioned backend part, refering to the Storage Account, respectively the Container for storing the Terraform State Files.
The configuration can be downloaded from: github.com - patkoch - patricks-aks-acr-backend
terraform {
  required_providers {
    azurerm = {
      source  = "hashicorp/azurerm"
      version = "~> 2.65"
    }

    random = {
      source  = "hashicorp/random"
      version = "3.1.0"
    }
  }

  backend "azurerm" {
    resource_group_name  = "patricksdemostorage"
    storage_account_name = "patricksdemostorage"
    container_name       = "microservice"
    key                  = "microservice.state"
  }
}

provider "azurerm" {
  features {}
}

resource "azurerm_resource_group" "patricks-rg" {
  name     = "patricks_blog_acr_aks_rg"
  location = "Germany West Central"
}

resource "azurerm_container_registry" "patricks-acr" {
  name                = "patricksblog"
  sku                 = "Premium"
  resource_group_name = azurerm_resource_group.patricks-rg.name
  location            = azurerm_resource_group.patricks-rg.location
}

resource "azurerm_kubernetes_cluster" "patricks-k8s-cluster" {
  name                = "patricks-aks"
  location            = azurerm_resource_group.patricks-rg.location
  resource_group_name = azurerm_resource_group.patricks-rg.name
  dns_prefix          = "patricks-dns"

  default_node_pool {
    name       = "default"
    node_count = 1
    vm_size    = "Standard_D2_v2"
  }

  identity {
    type = "SystemAssigned"
  }

  tags = {
    Environment = "Production"
  }
}

resource "azurerm_role_assignment" "enablePulling" {
  principal_id                     = azurerm_kubernetes_cluster.patricks-k8s-cluster.kubelet_identity[0].object_id
  role_definition_name             = "AcrPull"
  scope                            = azurerm_container_registry.patricks-acr.id
  skip_service_principal_aad_check = true
}
4 The Azure DevOps YAML Pipelines
This section explains the structure of the Azure DevOps YAML pipelines, which are capable of provisioning and destroying the resources.
4.1 Pipeline for Provisioning of the Microservice
I’m going to start with the pipeline for creating all resources of the microservice. Therefore, I’ll choose “Pipelines” …
…and “New pipeline”:
After that, you have to state where your source - the YAML code - is located - here select “Azure Repos Git”:

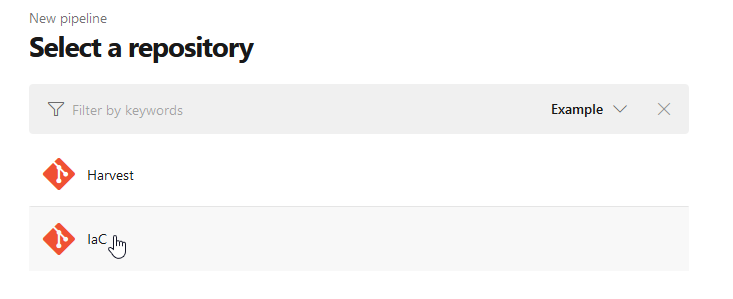
I’d like to add the source to a dedicated repository - named “IaC” for “Infrastructure as Code”:
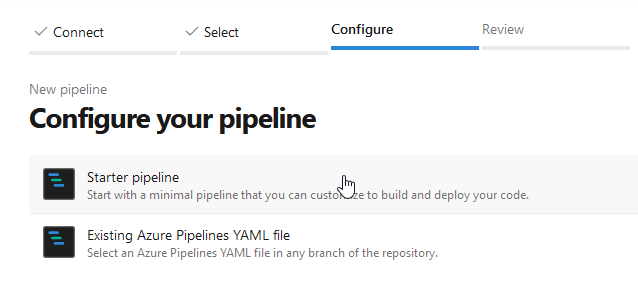
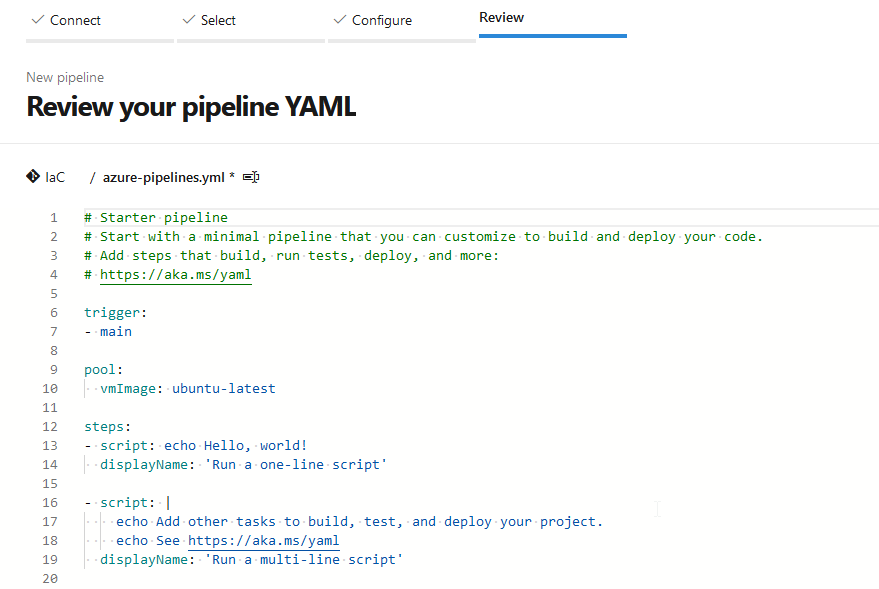
The next step is to configure the pipeline. Now I’ve to decide whether I’d like to add a “Starter pipeline” or whether I’d like to refer to an already existing YAML file. As I don’t have an already available YAML file, I’ve to choose “Starter pipeline”:
The Starter Pipeline provides following pre-configured pipeline - which I’ve to adapt in the following steps.
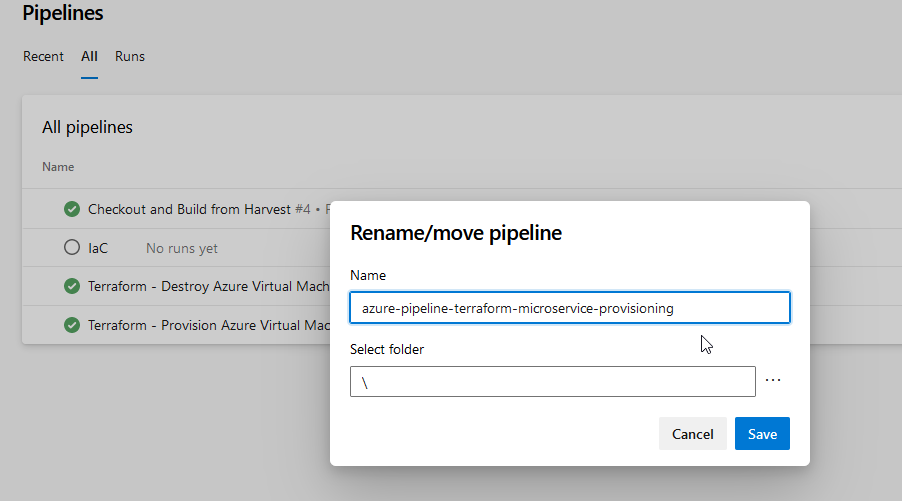
Before that, I’m going to rename and to save the pipeline to “azure-pipeline-terraform-microservice-provisioning”:
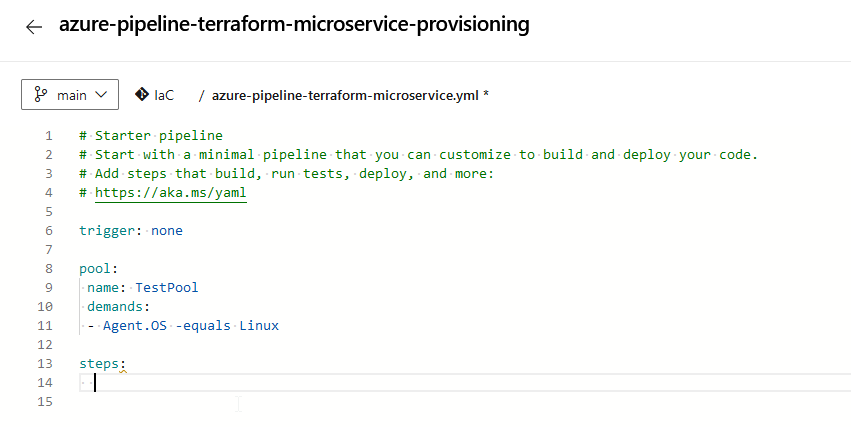
This results to the occurance of the .yml file in the local checkout directory of the “Iac” repository:

Now, I’d like to adapt the YAML source due to my needs. I’m going to disable the trigger, add “TestPool” for the “pool” section and provide a proper demand with regard to my Agent. After that, the steps have to be added. Just click below “steps:” in line 13 …
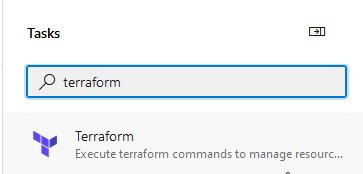
…and search for the Terraform task at the right:
Add this task and provide following data for implementing the Terraform “init” command:
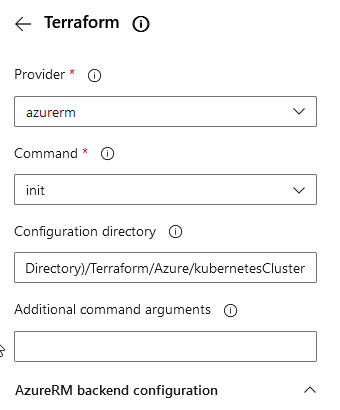
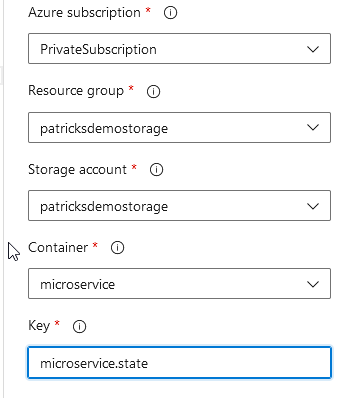
As you can see, this task refers to the Container of the Storage Account “patricksdemostorage”, as the “init” command establishes the connection to the backend. Therefore it is important to access the Terraform State Files - to get the information of the current state of the resources. The “Configuration directory” has to point to the location of the Terraform configuration file.
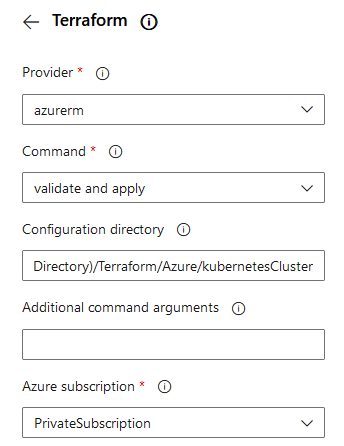
As the “init” command is complete, the next command has to be implemented - “validate and apply”. That’s quite simple, just choose “validate and apply” at the “Command” section, the “Configuration directory” is the same directory as for the “init” command.
The final source of the YAML Pipeline can be seen below:
trigger: none

pool:
 name: TestPool
 demands:
 - Agent.OS -equals Linux

steps:
  - task: TerraformTaskV2@2
    inputs:
      provider: 'azurerm'
      command: 'init'
      workingDirectory: '$(System.DefaultWorkingDirectory)/Terraform/Azure/kubernetesCluster'
      backendServiceArm: 'PrivateSubscription'
      backendAzureRmResourceGroupName: 'patricksdemostorage'
      backendAzureRmStorageAccountName: 'patricksdemostorage'
      backendAzureRmContainerName: 'microservice'
      backendAzureRmKey: 'microservice.state'
  - task: TerraformTaskV2@2
    inputs:
      provider: 'azurerm'
      command: 'apply'
      workingDirectory: '$(System.DefaultWorkingDirectory)/Terraform/Azure/kubernetesCluster'
      environmentServiceNameAzureRM: 'PrivateSubscription'
Now, it’s time to run the pipeline - click at “Run”:

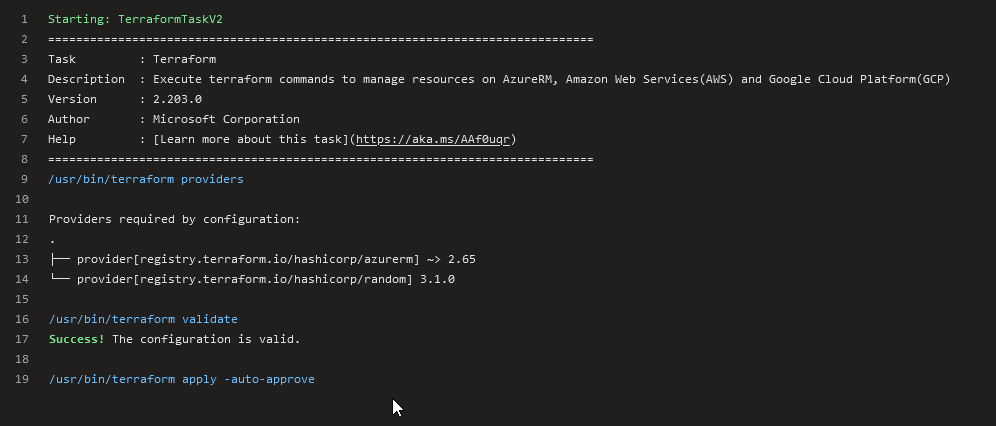
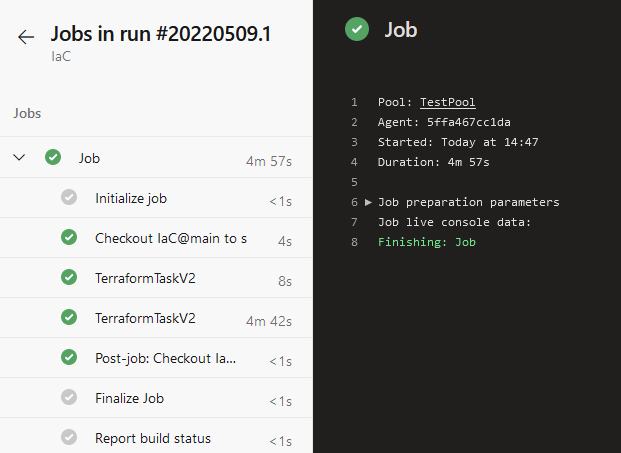
This triggers now a job of this created YAML pipeline. The logs should be similar as seen in the two pictures below:
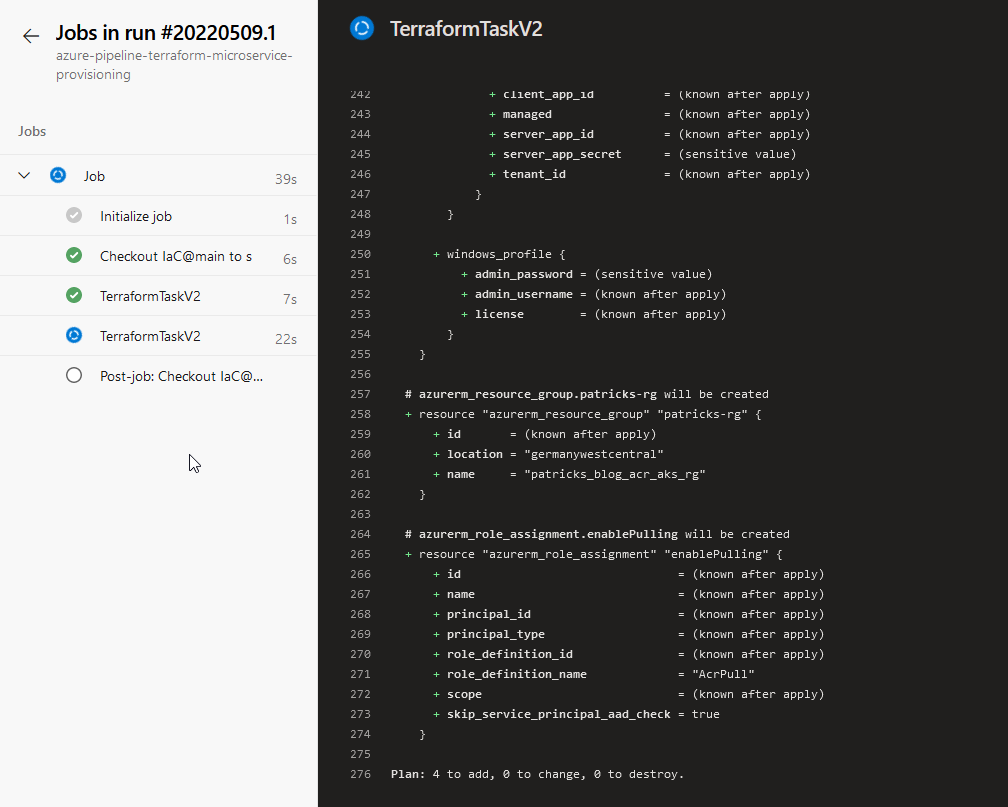
After running the pipeline, the Azure Kubernetes Service named “patricks-aks” is among others created:

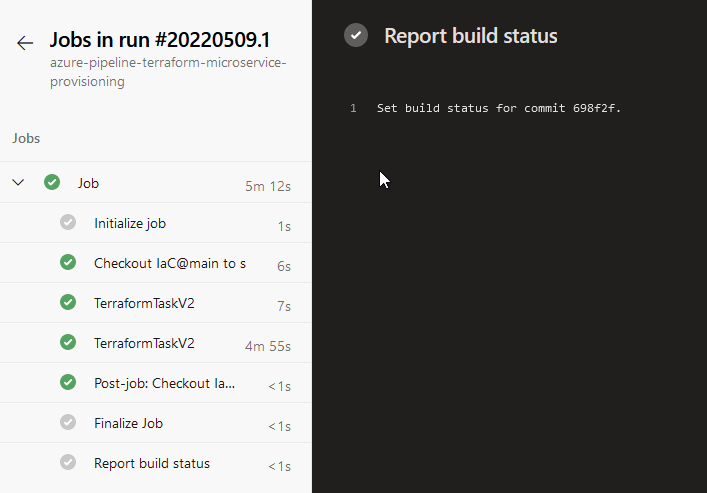
This pipeline provisioned the desired resources in Azure, of course you’d like to create an additional pipeline for destroying the resources.
4.2 Pipeline for Destruction of the Microservice
In this chapter, I’d like to explain an easy way to create the corresponding pipeline for destroying the related resources again. A quite simple approach would be to copy the .yml file in the local checkout directory and to rename it - for example:
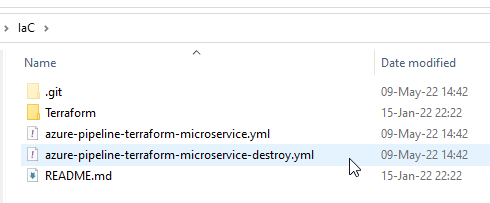
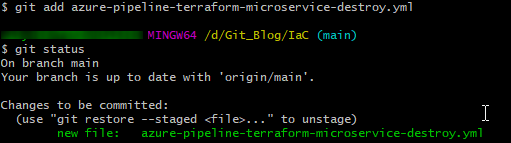
Now ensure to add the .yml file in a proper way to the Azure repository:
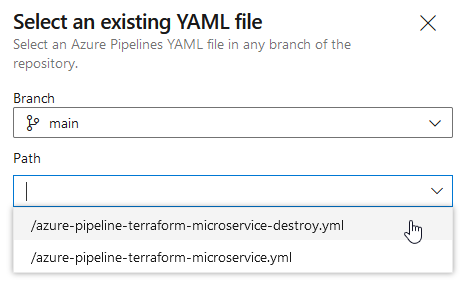
Again I’ve to add a pipeline, but in that case I’d like to select an already existing YAML source - choosing the copied .yml file, including “destroy”:
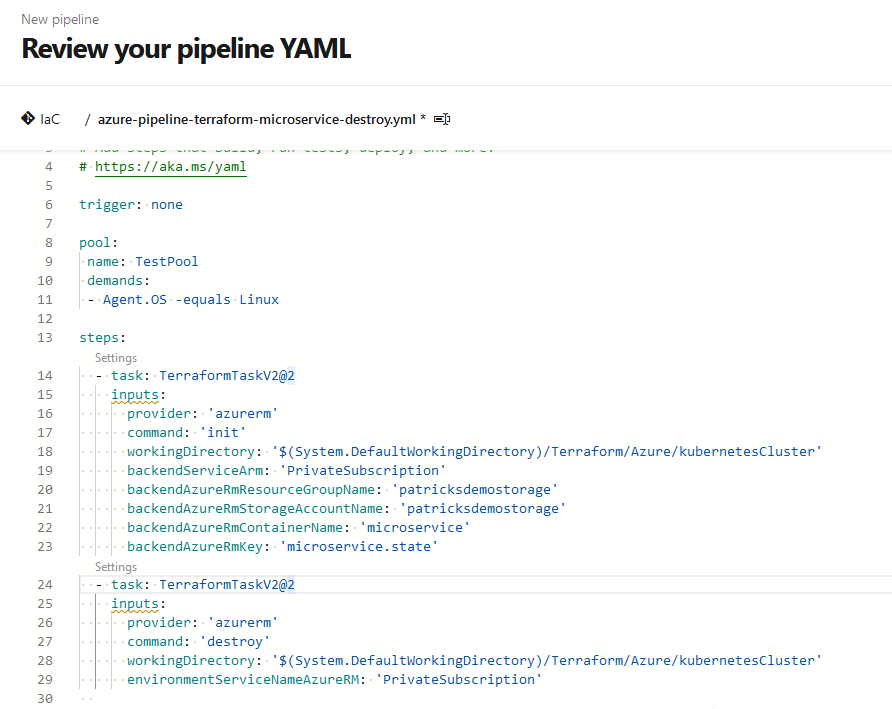
To implement the “destroy” command, simply delete the second task, which refers to the “apply” command:
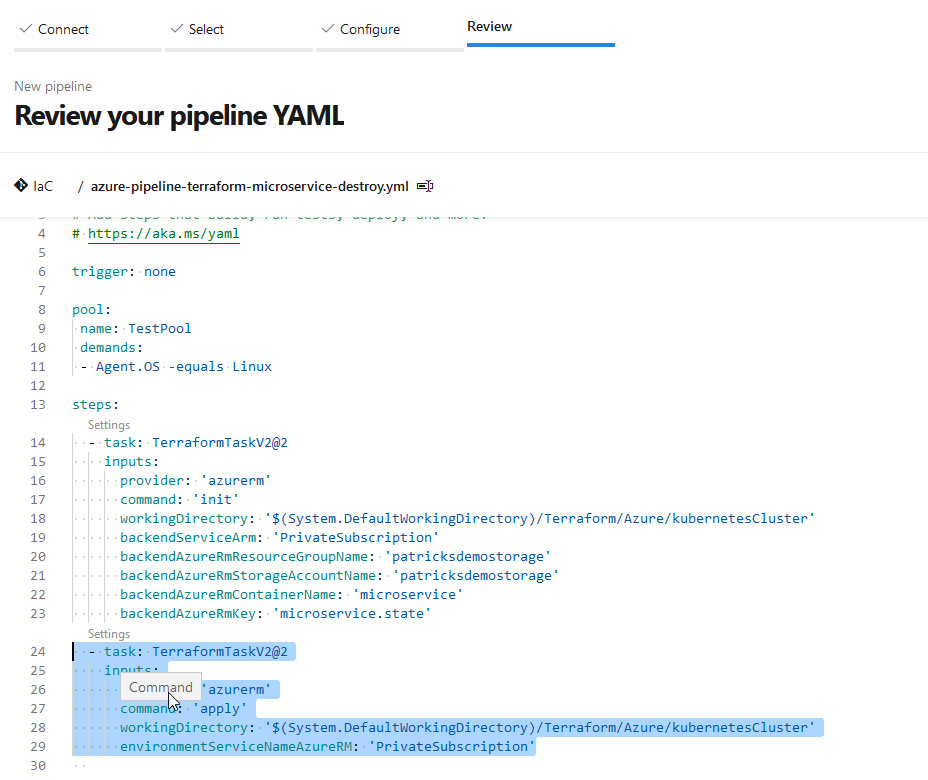
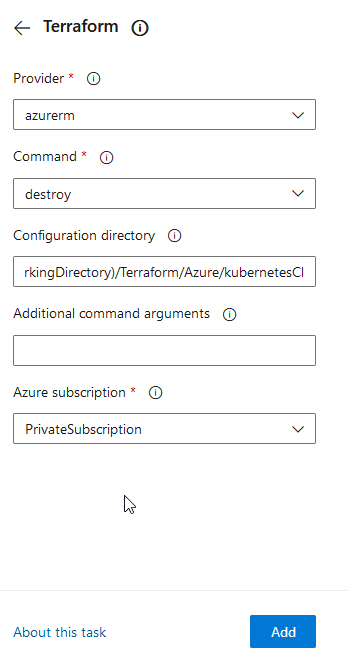
After that, add a new Terraform task, choose “destroy” at the “Command” section and click at “Add”:
Finally, your YAML source should look like that:
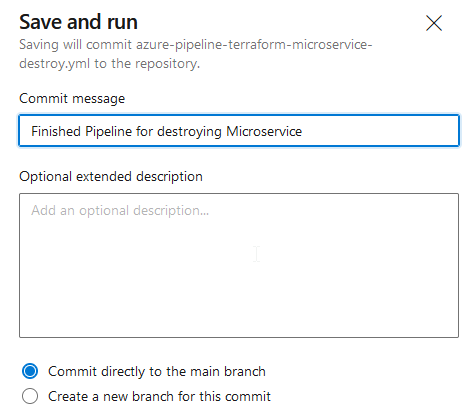
Let’s try it and run the pipeline:
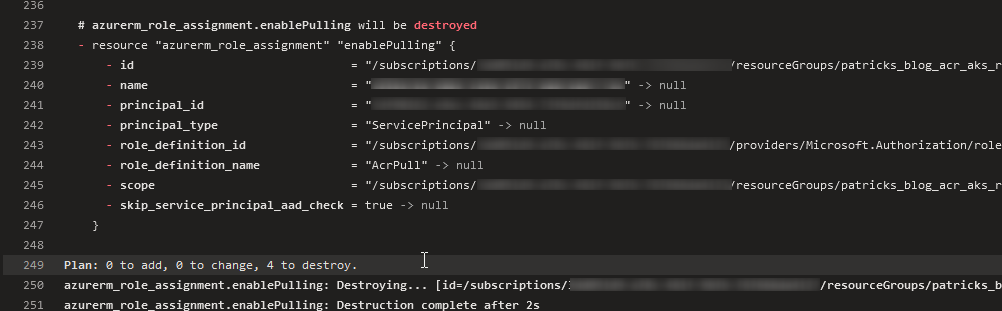
The logs should now reveal, that this pipeline is going to conduct destroy operations:
The pipeline job should run successfully - but as you can see, the pipeline is named “IaC”:
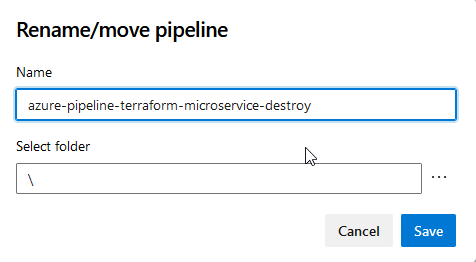
Therefore, my last step is now the rename the pipeline to “azure-pipeline-terraform-microservice-destroy”:
Finally, the result are two proper YAML pipelines for provisioning and for destroying the resources:

The snippet below contains the final source of the YAML pipeline for destroying the resources:
trigger: none

pool:
 name: TestPool
 demands:
 - Agent.OS -equals Linux

steps:
  - task: TerraformTaskV2@2
    inputs:
      provider: 'azurerm'
      command: 'init'
      workingDirectory: '$(System.DefaultWorkingDirectory)/Terraform/Azure/kubernetesCluster'
      backendServiceArm: 'PrivateSubscription'
      backendAzureRmResourceGroupName: 'patricksdemostorage'
      backendAzureRmStorageAccountName: 'patricksdemostorage'
      backendAzureRmContainerName: 'microservice'
      backendAzureRmKey: 'microservice.state'
  - task: TerraformTaskV2@2
    inputs:
      provider: 'azurerm'
      command: 'destroy'
      workingDirectory: '$(System.DefaultWorkingDirectory)/Terraform/Azure/kubernetesCluster'
      environmentServiceNameAzureRM: 'PrivateSubscription'
5 Conclusion
Azure DevOps YAML pipelines provide an easy syntax to implement the related tasks for your pipeline. With regard to Terraform, the corresponding tasks are available, which allow you to enter the related information by using a dialogue as help if you are not that familiar with the YAML convention. A probably tricky part is the AzureRM backend configuration with regard to a proper Container of a Storage account. But if that fits, the remaining implementation of an “apply” or a “destroy” is quite easy.
An additional benefit would be that the pipelines are versioned in an Azure repo. This enables e.g.: a fast and save way of recovering deployments of a specific commit.
6 References
docs.microsoft.com - yaml schema
docs.microsoft.com - Create a Storage Account
learn.hashicorp.com - Install Terraform
github.com - patkoch - aks-attached-acr
Azure && Azure DevOps - Provisioning a Windows Virtual Machine using Terraform