This post intends to explain how to provision (and destroy) a Windows virtual machine in Azure using Terraform. In addition, a remote desktop connection is being established.
Update (31st of February 2022): added YouTube video including for demonstration Update (19th of December 2023): updating the post regarding the Terraform commands and general improvements
Video - Watch the content of the post in my YouTube Video
1. Introduction
As migration to the cloud is becoming increasingly popular, it’s obvious to find efficient ways to move resources to the cloud. In the context of that post, a Windows virtual machine will be deployed in Azure using Terraform. This post shows a good practice approach related to Infrastructure as Code: how to deploy and destroy a Windows virtual machine in Azure using Terraform.
2. Prerequisites and Azure CLI commands
2.1 Prerequisites
Before diving into the provisioning steps, there are some mandatory prerequisites.
Despite of having an Azure subscription, install following:
2.2 Login to Azure
Let’s start with the login to Azure - you can get a subscription for free at azure.microsoft.com/en-us/free
I recommend to conduct all commands in VS Code using a new Terminal.
Run following command to start the login to Azure:
az login
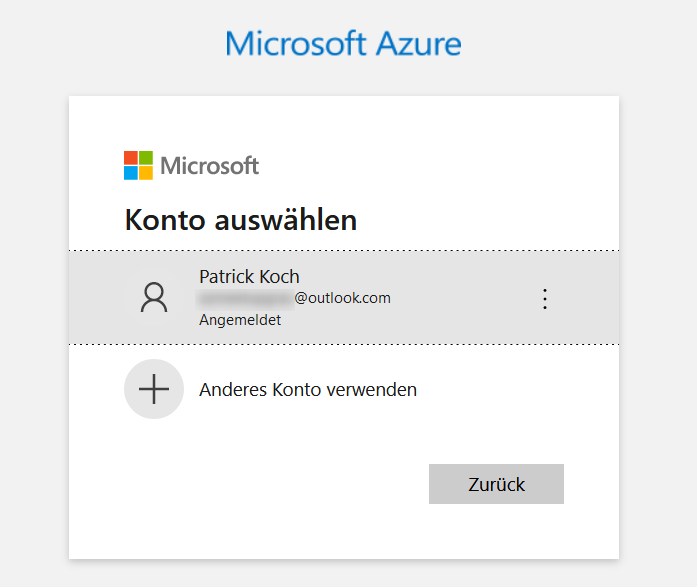
A new browser session pops up, use the login credentials of your account:
After that, switch back to VS Code, you should see logs similar in the picture shown below:

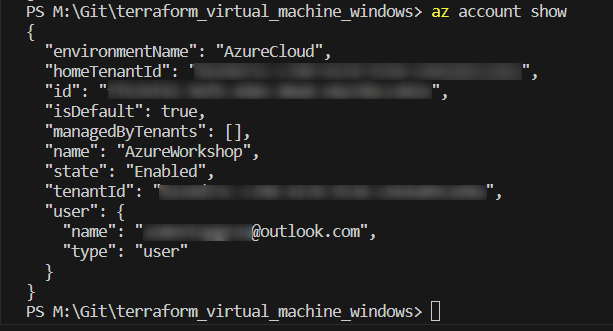
2.3 Prove your current subscription
You can prove whether you are using the right subscription using the following command:
az account show
This shows you the current subscription:
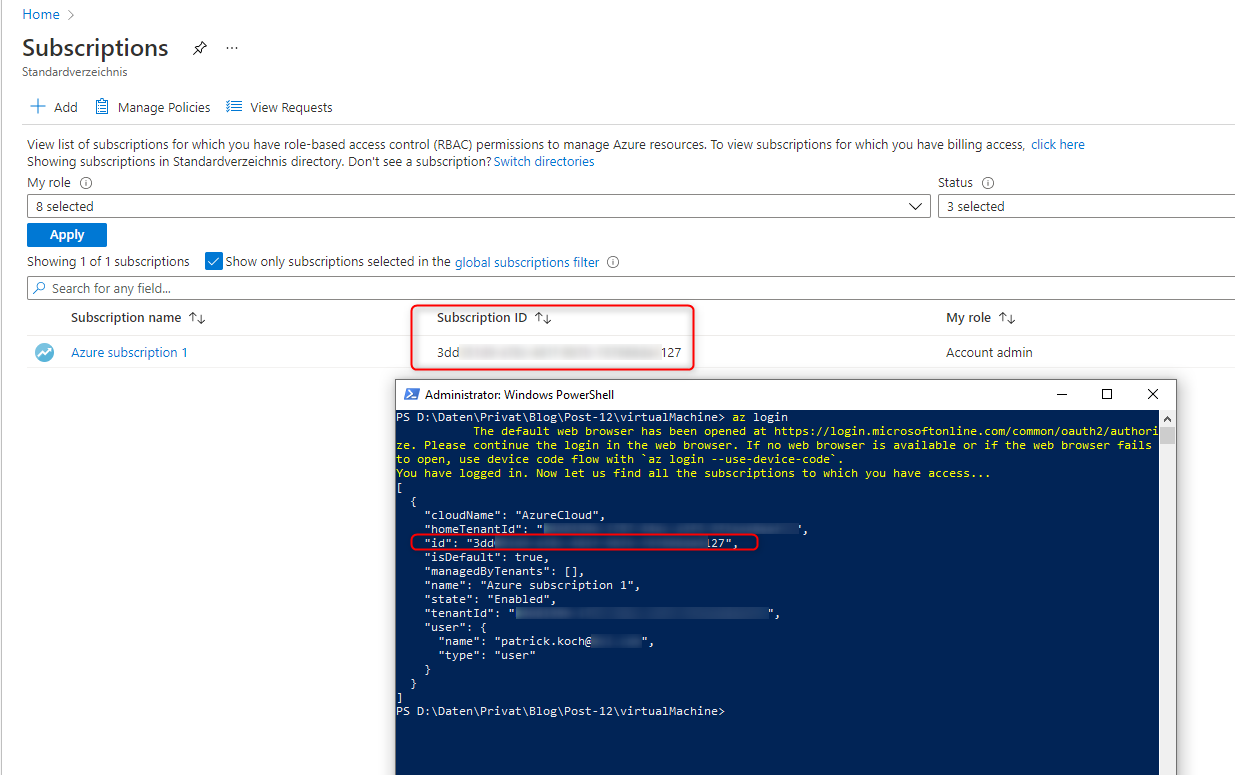
Where to get the subscription ID?
You can find the Subscription ID at “Subscriptions”, at the Azure Portal:
2.4 Get a proper location
As a final step with regard to the prerequisites, I’d like to find a proper location for the deployment of my virtual machine. A full list of locations can be provided by entering following command:
az account list-locations -o table
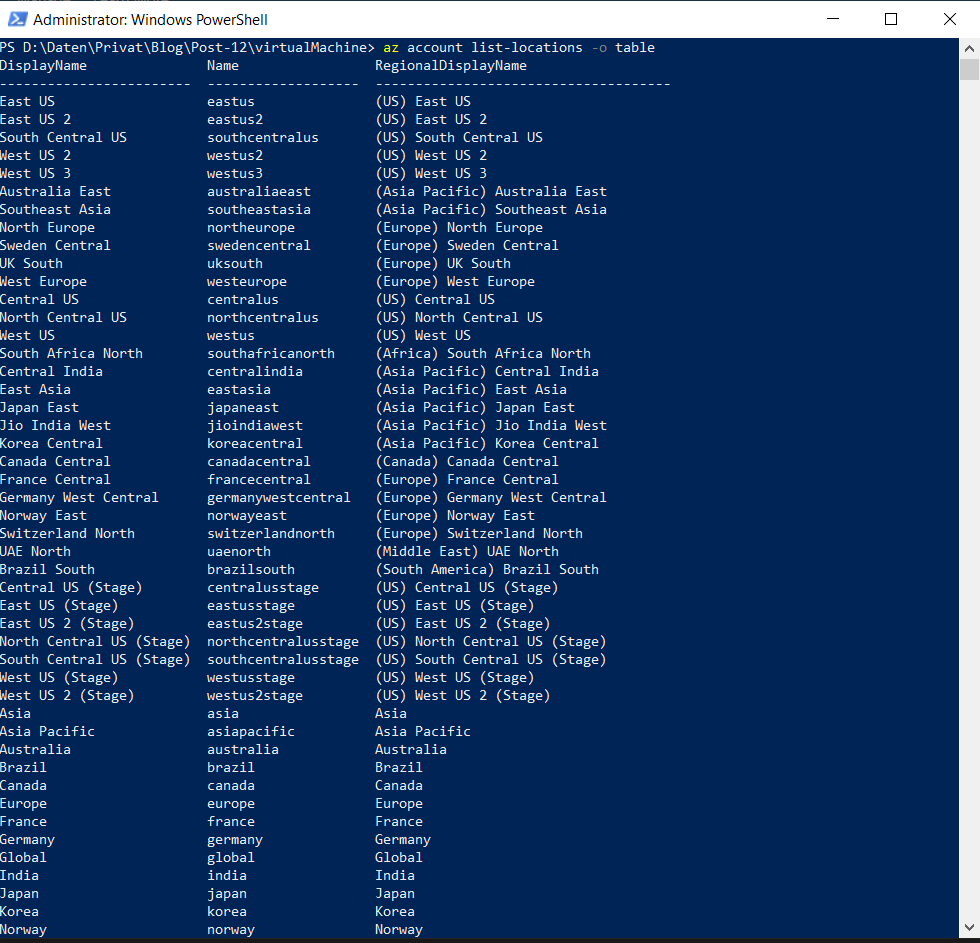
In my case, I’m going to choose “germanywestcentral” as location. Just remember your location for adapting the Terraform Configuration File.
Reference
GitHub - Azure: Azure CLI List Locations
3. The Terraform configuration
The source of the following Terraform configuration file refers to two already provided great example usages of the Terraform page https://registry.terraform.io. Therefore please see the provided links at “References” at the end of that subsection. I’ve just adapted the file, respectively distributed the configuration to four files - see
GitHub - patkoch: terraform_virtual_machine_windows
resource "azurerm_resource_group" "rg" {
  name     = "example-resources"
  location = "germanywestcentral"
}

resource "azurerm_virtual_network" "v-net" {
  name                = "example-network"
  address_space       = ["10.0.0.0/16"]
  location            = azurerm_resource_group.rg.location
  resource_group_name = azurerm_resource_group.rg.name
}

resource "azurerm_subnet" "subnet" {
  name                 = "internal"
  resource_group_name  = azurerm_resource_group.rg.name
  virtual_network_name = azurerm_virtual_network.v-net.name
  address_prefixes     = ["10.0.2.0/24"]
}

resource "azurerm_network_interface" "net-int" {
  name                = "example-nic"
  location            = azurerm_resource_group.rg.location
  resource_group_name = azurerm_resource_group.rg.name

  ip_configuration {
    name                          = "internal"
    subnet_id                     = azurerm_subnet.subnet.id
    private_ip_address_allocation = "Dynamic"

    public_ip_address_id = azurerm_public_ip.pub-id.id
  }
}
# Template Source: https://registry.terraform.io/providers/hashicorp/azurerm/latest/docs/resources/windows_virtual_machine

resource "azurerm_public_ip" "pub-id" {
  name                = "acceptanceTestPublicIp1"
  resource_group_name = azurerm_resource_group.rg.name
  location            = azurerm_resource_group.rg.location
  allocation_method   = "Dynamic"

  tags = {
    environment = "Production"
  }
  # Block Public IP Source: https://registry.terraform.io/providers/hashicorp/azurerm/2.55.0/docs/resources/public_ip
}

resource "azurerm_windows_virtual_machine" "example" {
  name                = var.my_virtual_machine_name
  resource_group_name = azurerm_resource_group.rg.name
  location            = azurerm_resource_group.rg.location
  size                = var.my_virtual_machine_size
  admin_username      = var.my_virtual_machine_user
  admin_password      = var.my_virtual_machine_password
  network_interface_ids = [
    azurerm_network_interface.net-int.id,
  ]

  os_disk {
    caching              = "ReadWrite"
    storage_account_type = "Standard_LRS"
  }

  source_image_reference {
    publisher = "MicrosoftWindowsServer"
    offer     = "WindowsServer"
    sku       = "2016-Datacenter"
    version   = "latest"
  }
}
References
Hashicorp - azurerm - Windows Virtual Machine
Hashicorp - azurerm - public ip
4. Deploy the virtual machine
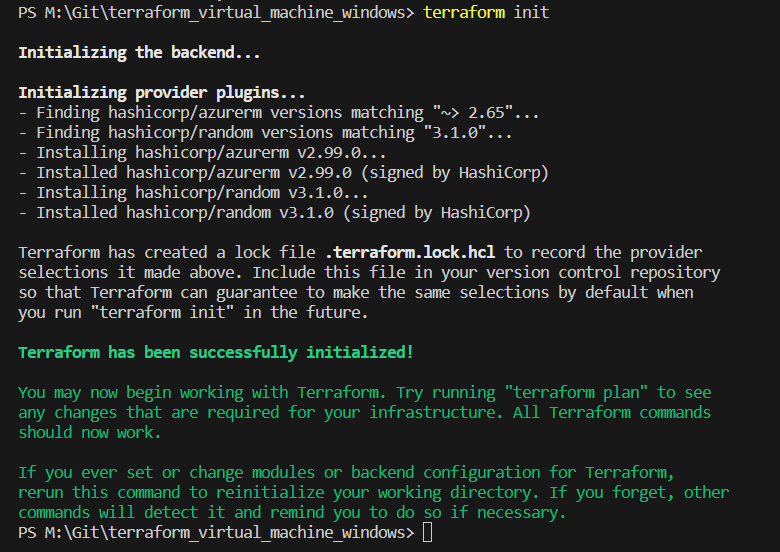
The first Terraform command is the “init” command:
terraform init
The logs in the picture below show a successful execution of the command:
As next, run the “format” command, to ensure that all files of your configuration stick to specific language style conventions:
terraform fmt
After that, ensure that your Terraform configuration is valid by executing:
terraform validate

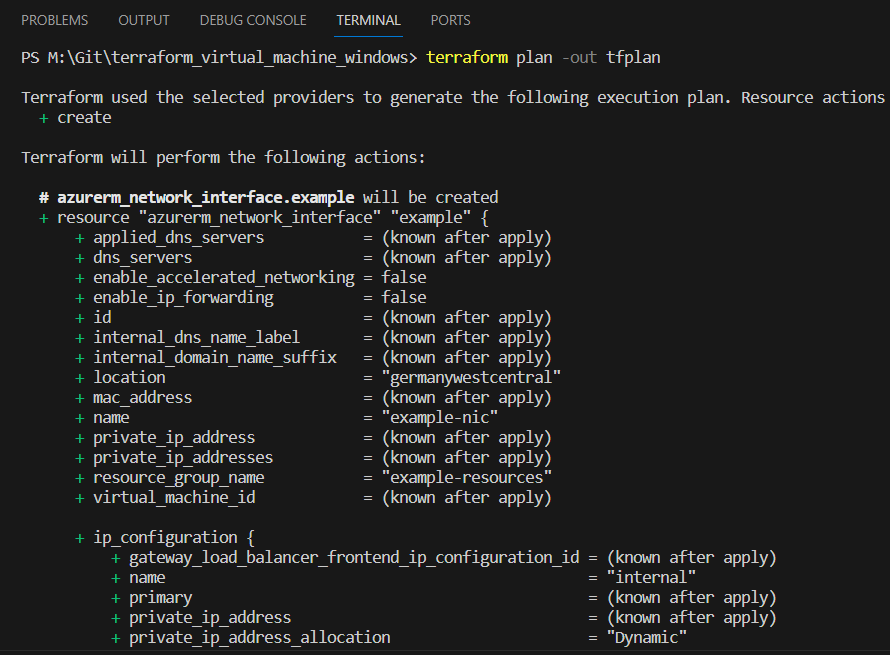
Create now a Terraform plan file, by running:
terraform plan -out tfplan
This creates a file named “tfplan” in your directory:
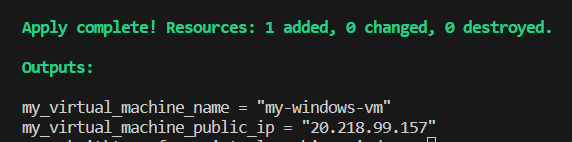
Finally, the command can be executed for deploying the virtual machine on Azure - it uses the Terraform plan named “tfplan” as an argument:
terraform apply "tfplan"
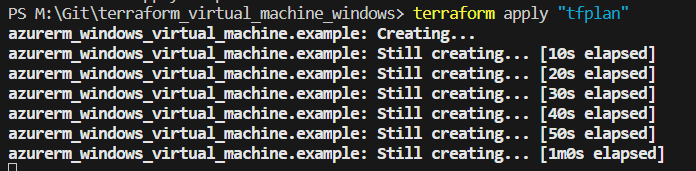
The deployment was successful if following log message appears:
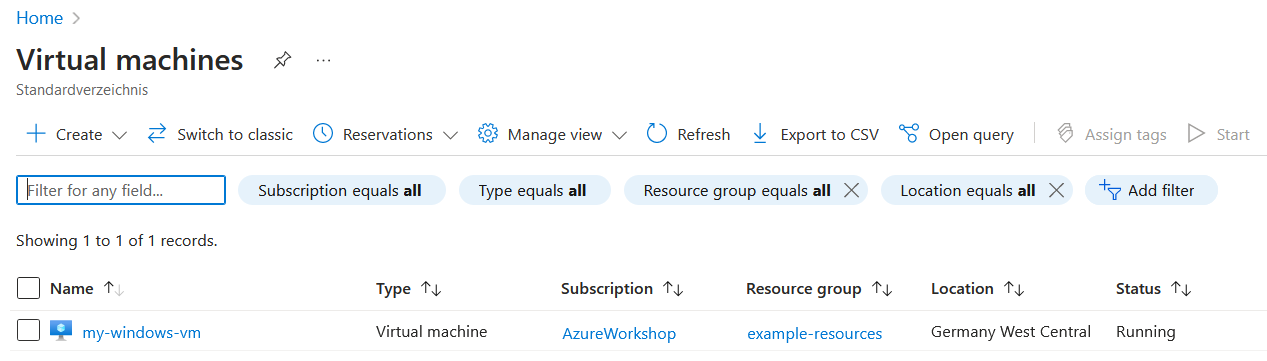
Prove the deployment of the virtual machine in the Azure portal:
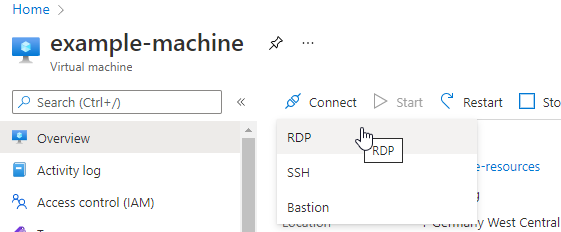
5. Establishing a RDP Connection to the Virtual Machine
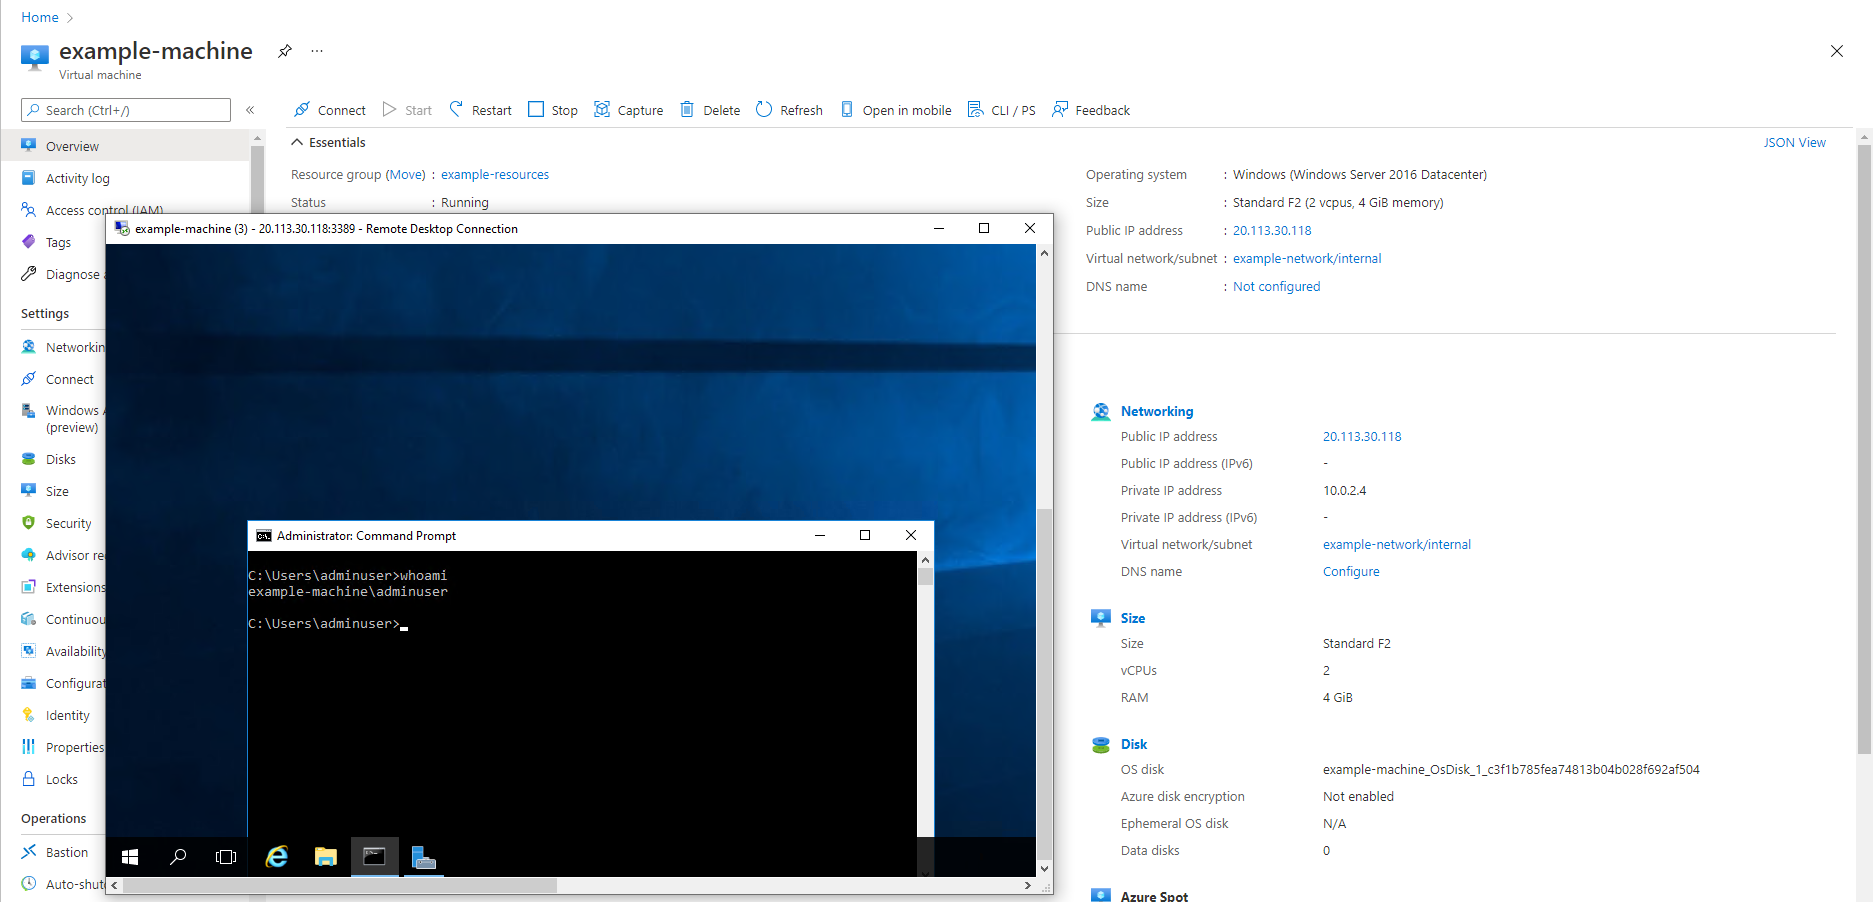
After a few minutes, the machine should be ready to establish a connection with RDP. Click at “Connect” and choose “RDP”:
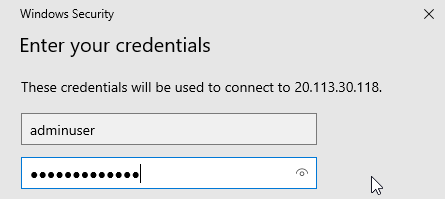
Enter the credentials - they can be copied from the Terraform Configuration File.
Finally, it should be capable of getting accessed:
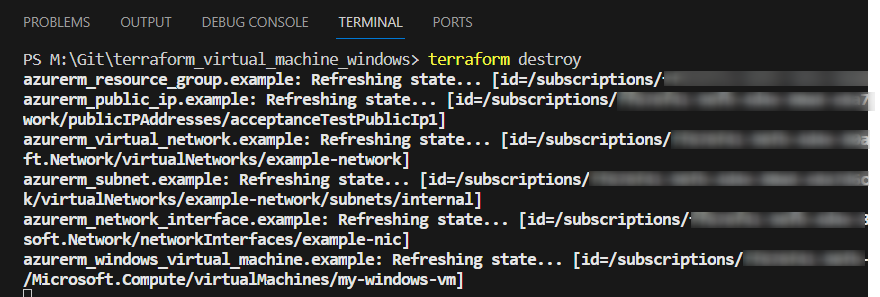
6. Destroy the virtual machine
The virtual machine can be destroyed using the following command:
terraform destroy
7. Conclusion
Conducting provisioning operations of resources in the Azure Cloud using Terraform works great and is also supported with a good documentation and many content at https://stackoverflow.com. Of course I’d suggest to use Infrastructure as Code concepts wherever possible. Refering to cost savings, it makes especially sense to start with virtual machines for applying Infrastructure as Code approaches, as virtual machines allocate much more costs in contrast to (among others) containers (of course ;)). Many machines can be used in a more efficient way: provision them when you need them, but afterwards destroy them for saving costs if they don’t need to serve for running services, which should be available all the time.
References
Microsoft - Azure: Create free Azure account
Microsoft - Azure: Install Azure CLI
Hashicorp - Terraform Recommended Guidelines
GitHub - Azure: Azure CLI List Locations